How to Use Iron on Vinyl Cricut: Easy Guide and Helpful Tips
Do you want to make beautiful designs on your T-shirts? Are you interested in learning how to use iron on vinyl Cricut? If yes, you have come to the right place! Here, I am going to explain how to use iron-on vinyl with a Cricut machine and a heat press. By the end, you will know exactly how to customize your T-shirts and many more.
Iron-on vinyl, also known as heat-transfer vinyl, has a heat-activated adhesive and can be used on a variety of materials, like fabric, paper, metal, and wood. To transfer the vinyl onto your material, you will need a heat press machine. Let’s get started and explore everything you need to know!
What Supplies Do You Need for Using Iron-on Vinyl?
You need to know how to use iron on vinyl Cricut to work on your DIY projects. But before that, you need to know the materials you will need. In order to use iron-on vinyl on your base materials, you will need some supplies. The most important tools are the press machine and the cutting machine, but you need other things as well.
Here are the things you will need to use iron-on vinyl:
- Cricut machine
- Fine-Point blade
- StandardGrip mat
- Weeding tool
- Heat Press machine
- Cricut Heat app
- T-shirt
How to Use Iron on Vinyl Cricut: 7 Easy-To-Follow Steps
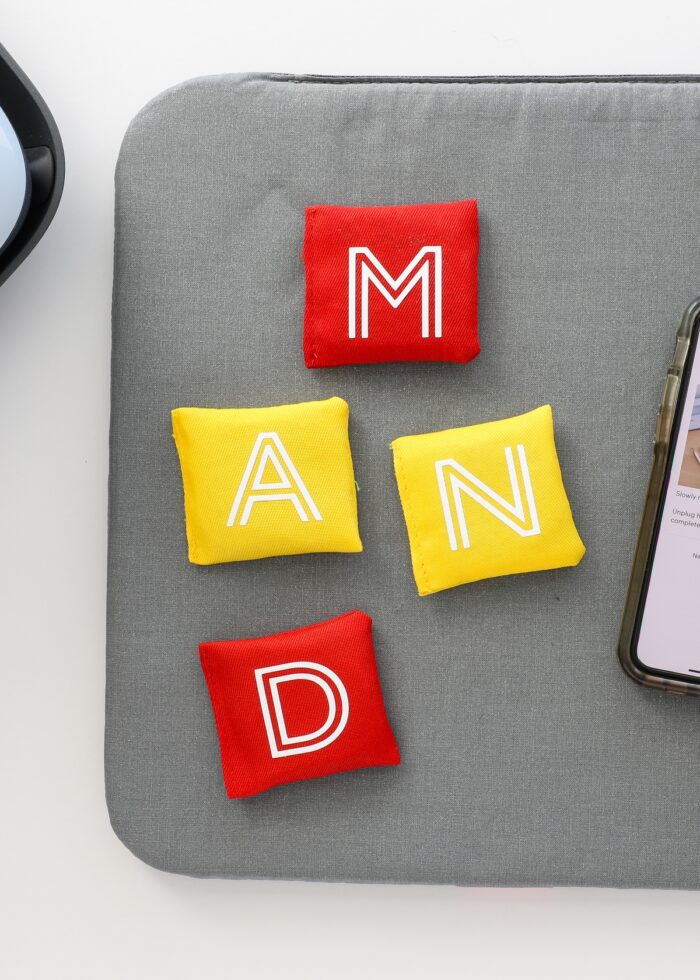
Once you collect all the required supplies to use the iron-on vinyl, you can proceed to use it for your projects. Here, you will see the example of Little Bearbags created with iron-on vinyl. Here are the steps you have to follow in order to make projects using vinyl.
Step 1: Design Your Project on Design Space
Just like any other Cricut project, the first thing you have to do is start creating a project using the Design Space app on your phone or computer. Next, you have multiple options to create, choose, or upload any design on the software. At the same time, you can use the tools on the app to customize your design however you wish.
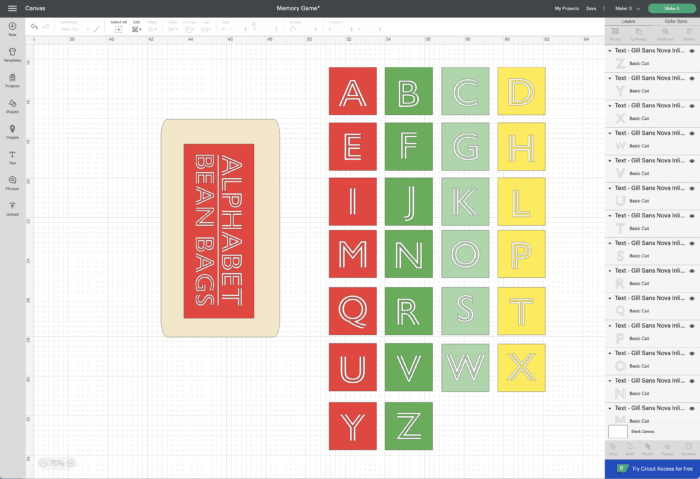
After the design is finalized, you have to click on Make It, and it will send it to your machine.
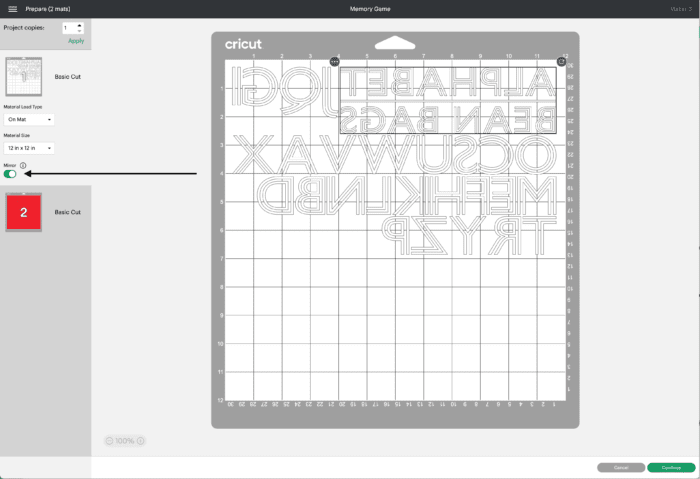
Step 2: Reverse the Design on the Cricut App
In the way of learning how to use iron on vinyl Cricut, one thing is important: you have to reverse the design before you send it for cutting. This is essential because when you put the iron-on vinyl on your machine, you put the shiny parts downward. Currently, it means getting cut on the vinyl. You will need to use the mirror tool to reverse the design. So, the end result is exactly how you would want.
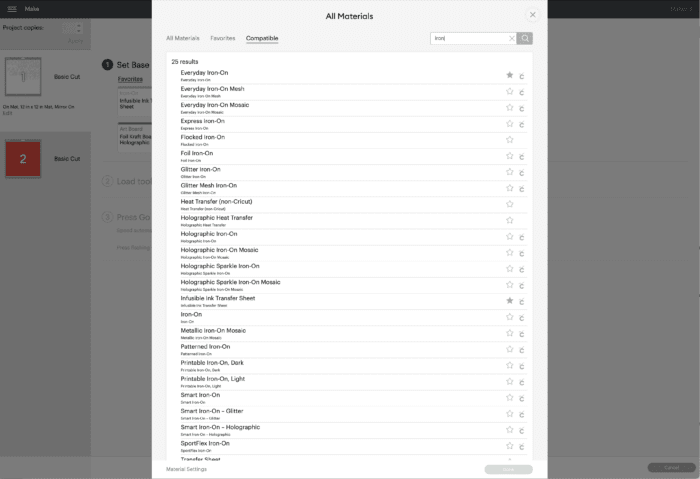
Step 3: Select the Correct Settings for Cutting
After reading the design and reversing it on the Design Space software, you must choose the current material settings for the cutting. After that, you have to go to the material settings and select your material. To be precise, go to the Custom Material menu and select the exact iron-on you are using.
Step 4: Load and Cut the Vinyl Into Your Machine
Now, you will need to place iron-on vinyl on a machine mat. While doing so, remember to put the shiny part of the vinyl towards the downside and the dull part facing up.
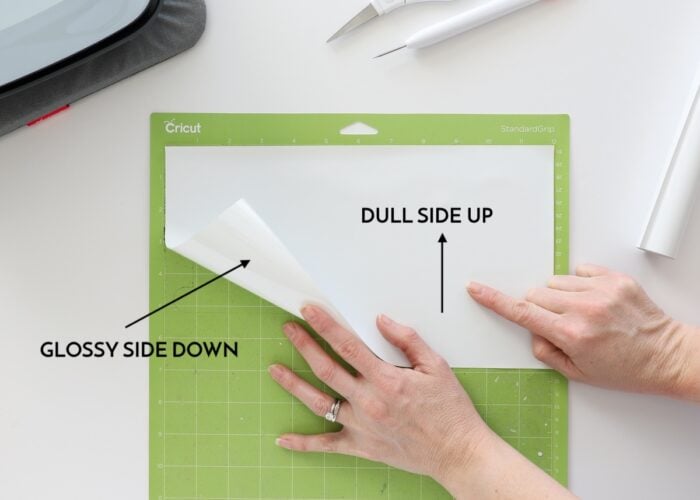
After placing the vinyl on a mat, put it inside the machine and press the Load button. Then, click the Go button, and the machine will start cutting the design.
Step 5: Weed the Design from Iron-on Vinyl
Once the machine finishes cutting the design, you have to remove all the unwanted parts of the design. To do this, you can use a weeding tool, as removing it from your hand will not give you satisfactory results.
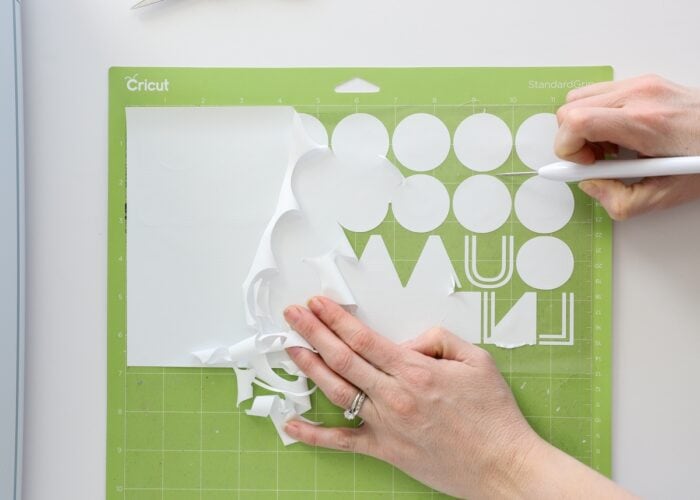
The surprising part is that iron-on vinyl weeds very beautifully without putting a lot of effort. Once you have completed the weeding, you should trim all the letters from your design.
Step 6: Set the Time/Temperature on Your EasyPress Machine
Before applying heat to the design, you will need to set the time & temperature for the EasyPress machine. Setting up the time and temperature is important as various materials and base materials require different temperatures and timing to get if transferred.
Cricut now has an application specifically designed to manage the press machine. Here, you can set the temperature and time according to your convenience.
Step 7: Use Your Cricut Heat Press Machine
Finally, you can use the press machine on your base material. Before using it, you will have to preheat the machine. Once it reaches the desired temperature, you should preheat the base without the material on it. You should heat the base for 5-15 seconds. This will prepare the material for fusing well. Once everything is set, you must apply the press machine to your material.

After heating the design, you should flip it and heat it from the other side as well. Once the design is placed on your base material, you will need to peel off the transfer sheet, and you have successfully used the iron-on vinyl to make your design.
FAQs
How Can I Use Iron-on Vinyl?
Using the iron-on material on any fabric is easy. This is a process you have to follow:
- First, put your iron in the cotton or linen setting.
- If you are using the steam iron, keep the steam setting off.
- Then, you have to preheat the material for 10-15 seconds.
- After that, place your design on the material.
- Now, apply heat on all the parts for 50 seconds
- Don’t apply more or less pressure on the machine.
- After heating, let the material cool, and your design is ready.
How Much Temperature Is Good for Iron-on Vinyl?
You should apply it to your iron-on vinyl, depending on the material you are using. If you are using any regular material, the average temperature must be 315°F. If you are using a foil iron-on, the temperature has to be 295°F. If you are using a glitter iron-on, you will have to apply a temperature of 330°F.
Do I Need to Mirror Iron-on Vinyl?
Yes, you do! Before you use the heat transfer vinyl, you need to mirror it. When you put the vinyl inside the Cricut cutting machine, you should put the dull side of the material to face the cutting blade. This will cause the shiny side of the vinyl to face the mat, helping the vinyl retain its shine.
cricut explore air 2 accessories


Comments
Post a Comment