How to Use Cricut Explore Air 2 Machine? [Ultimate Guide]
You got your Cricut Explore Air 2 machine; that’s amazing. But are you wondering how to use it? Well, I can understand this issue deeply as I was there a few years ago. That’s why I have come up with a brief guide to give you a little insight into how to use the latest Explore Air 2 machine. So, if you are seeking how to use Cricut Explore Air 2, you are in the right place. Let’s talk about Explore Air 2 for a moment.
It’s a machine that can cut over 100 materials, such as cardstock, iron-on, vinyl, glitter paper, etc. This machine is compatible with many great tools to create unique designs and stunning projects. Do you want to create one?

Through this guide, I will tell you how I used this machine in my crafting journey. So, take it easy and move forward to use your latest Cricut machine, and don’t forget to download the Cricut Design Space to use the machine.
What Do You Need to Use Cricut Explore Air 2?
Before you get started with the Explore Air 2 machine, you need to know what supplies you need to start. You can create any craft using these simple accessories. Here is the list of them.
- Your brand new machine
- Weeding tool
- Fine point blade
- Cutting mat
- Scrapper
- Vinyl
- Smart materials
- Scissors
All these accessories are required to get started with your Explore Air 2 machine. Before you actually use the machine, you need to set it up on your devices, like a computer or a mobile device. So, let’s see how you will set it up.
How to Connect Cricut Explore Air 2 on a Computer (Windows/Mac)?
Setting up a Cricut machine on a computer is a simple process and only takes a few minutes. However, you should know that the machine uses a Bluetooth connection to set up. So, let’s get started.
For Windows
- On your Windows computer, go to the Start menu on the taskbar.
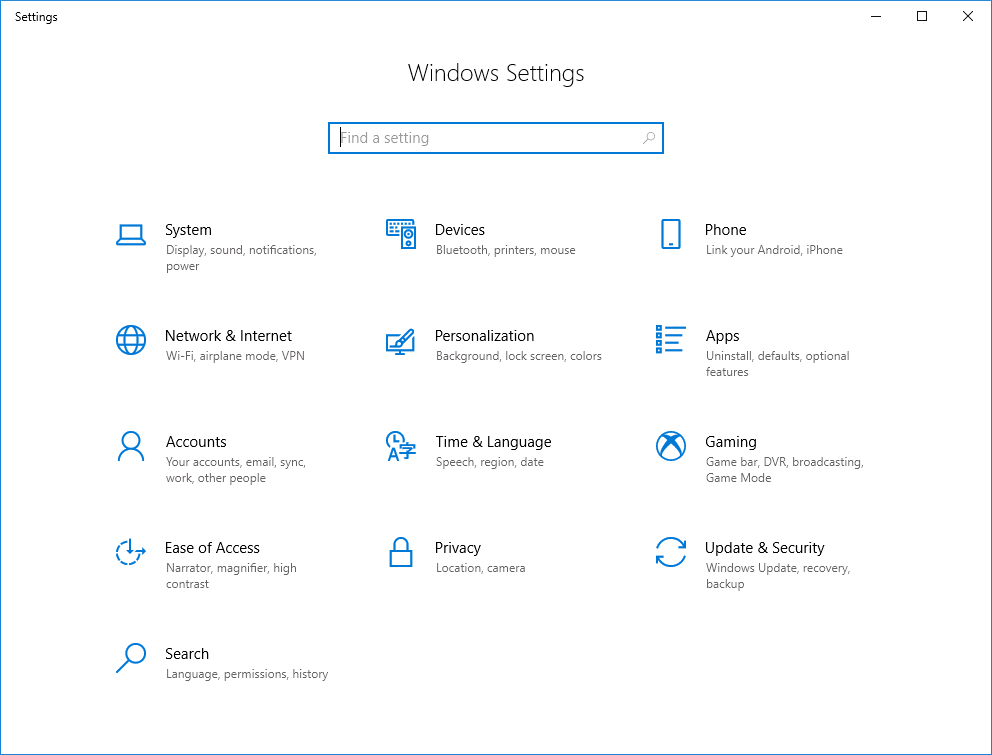
- Then, tap on the Settings from the option list.

- Now, tap on the Devices option under the Settings window.
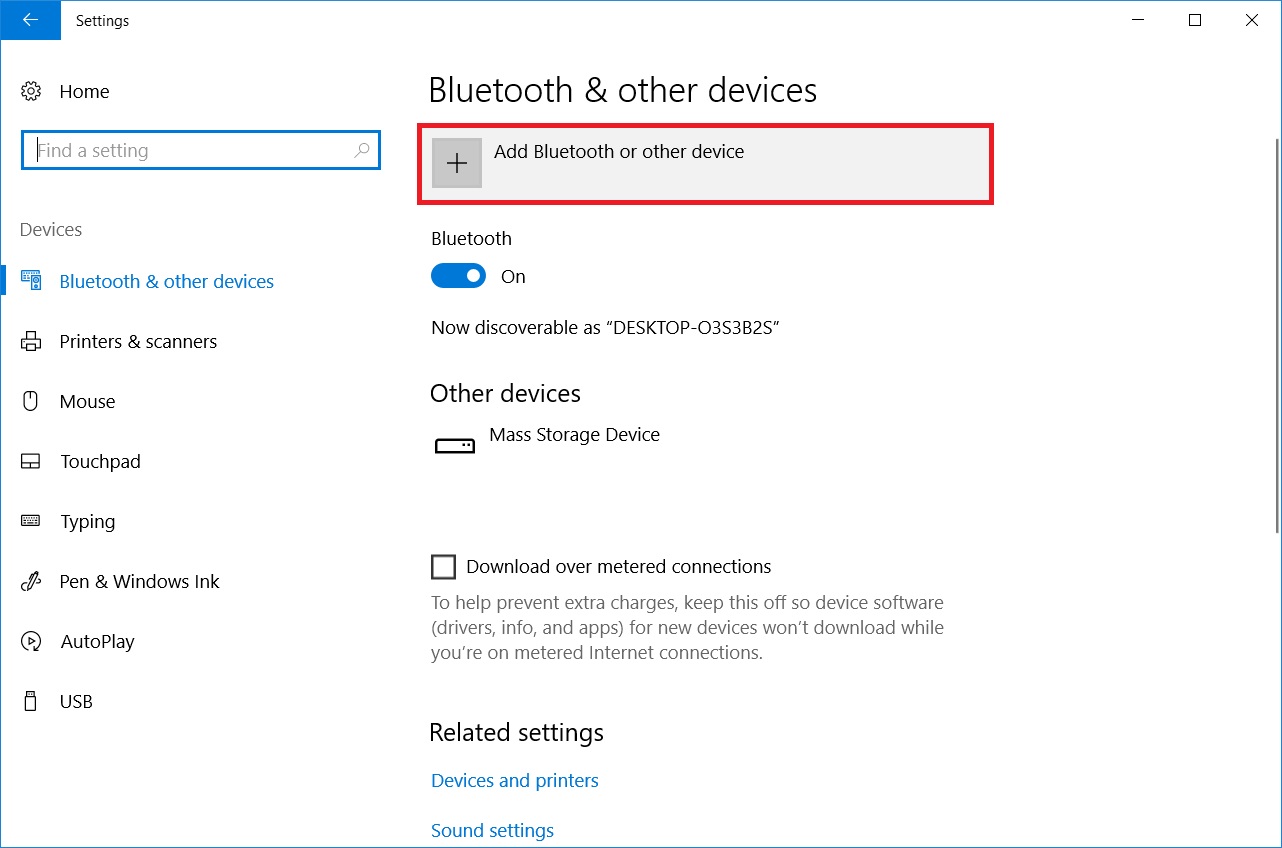
- After that, ensure that the Bluetooth option is ON and then select the “Add Bluetooth or other device” option.

- Next, select the Bluetooth option, and then your PC will start scanning your Explore Air 2 machine.
- When the screen asks you to enter a PIN, type “0000.”
- At last, the Explore machine will connect to your Windows computer.
So, these are the final steps to connect your Cricut Explore machine to the Windows computer.
For Mac
- Initially, go to the Apple menu and choose the System Preferences option.

- Then, tap on the Bluetooth option and ensure that the option is powered on.
- Now, select the pair option with the Explore Air 2 machine.
- When the screen asks you to enter the code, type 0000.
- In the end, your machine will pair up with the Mac computer.
That’s how you can Set up your Explore Air 2 machine on a Mac computer.
How to Set Up Cricut Explore Air 2 on a Computer?
When you connect your machine to the computer, you are ready to set it up on your device. In this step, you’ll have to download the Design Space app, which will allow you to use the machine to create crafts. Here are the steps.
- In the first step, head to Cricut’s official website on your computer.
- Select your machine and search for the Cricut Design Space app.
- Then, you’ll see the Download option on your system.
- Click on the option, and the application will start downloading on your computer.
- The app will download in your Downloads folder.
- In the next step, you need to go to your Downloads folder and double-click on the file.

- Then, the installation will run. Allow it to complete.
- Once the installation is completed, open the app and sign in to the Cricut ID with your Cricut ID.
- If you are a beginner, create a new ID and then sign in.
In the end, the machine will ask you to perform a test cut. Go for it and test the machine’s functions.
How to Use Cricut Explore Air 2 Machine on a Computer?
When you complete your Explore Air 2 machine setup, you are all ready to use your brand-new machine. So, here are the steps to go forward with that.
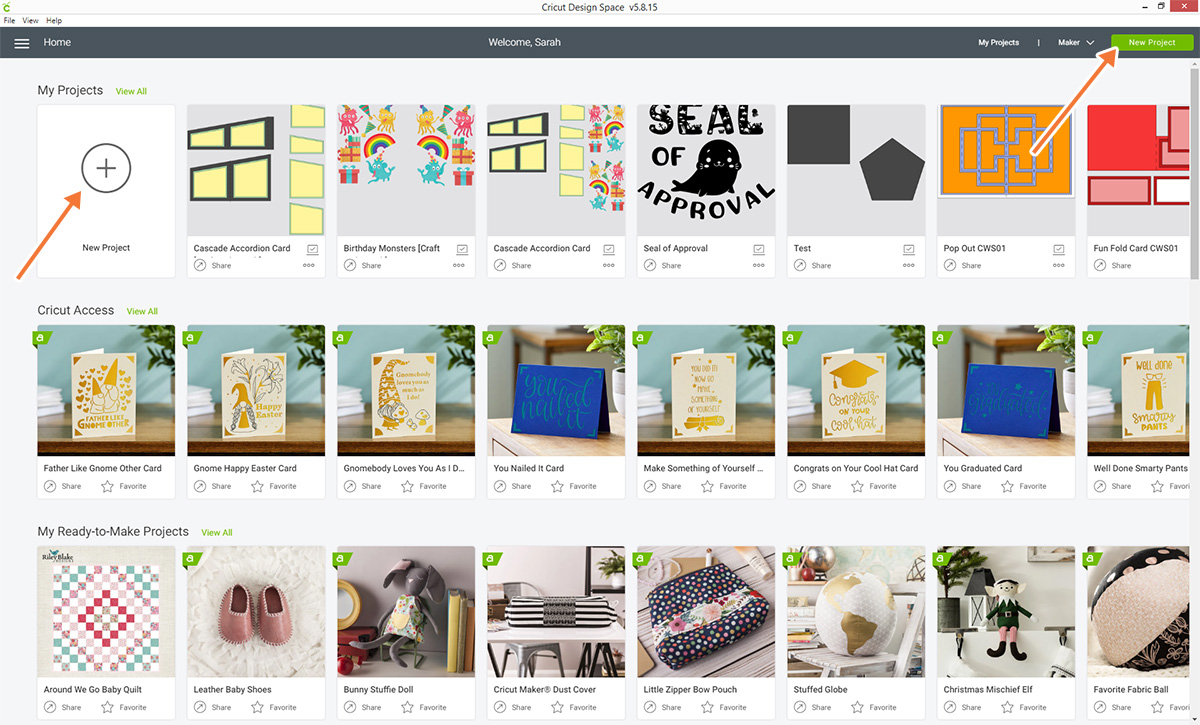
- Initially, open the Cricut Design Space app on the desktop.
- Then, move to the Canvas option and open the New Project option.

- Now, you will have access to all the ready-to-make designs on your Cricut. There are unlimited fonts, images, and texts to use from Cricut’s library.
- After that, select the machine you are using.
- When you are done with the design, you can upload the mat to your machine if needed.
- Next, you have to select the cutting material you are using and load it on your machine. Note: Smart materials don’t need a Cricut mat.
- Once you are ready with the cutting material, tap on the Go option to start the cutting process.
Note: You need to ensure that the blades and materials are correctly placed and used for the final cutting. So, here, the process ends, and you can try it by yourself. Hopefully, now you know how to use Cricut Explore Air 2 machine on your computer.
Source :- https://designaccessoriesmart.com/how-to-use-cricut-explore-air-2-machine-ultimate-guide
Comments
Post a Comment